Posts Tagged ‘Chocolate’

Summer Chillers: Chunky Chocolate Cherry Ice Cream

August 19, 2008

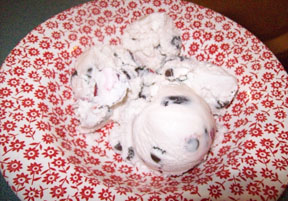
I had cherries and whipping cream left over from last week’s Summer Chiller. I’ve made ice cream a few times this summer, and I thought I’d try making it with cherries. Nothing goes better with cherries than chocolate, so I threw in some milk chocolate chips. I actually cobbled together a few different recipes to come up with this. I also used a no-cook, eggless ice cream base this time.

Chunky Chocolate Cherry Ice Cream

2 cups milk

1 cup sugar

2 cups whipping cream or half and half

2 tbs almond extract

1 cup pitted and chopped cherries macerated in 1/4 cup of sugar

1 cup of milk chocolate chips

Pit and chop cherries. Stir in 1/4 a cup of sugar. Refrigerate for one hour.

Combine milk, cream, sugar and almond extract. Stir briskly, about two minutes until sugar is dissolved. (Undissolved sugar crystals may be a cause of large ice crystal formation.)  Pour into a 1-gallon ice cream freezer, and freeze according to manufacturer’s directions. When ice cream is partially frozen, add in cherry mixture and chocolate chips. (Again make sure all the sugar in the cherry mixture is dissolved.) Finish freezing. Put in a covered container and place in the freezer several hours to harden.

The Chocolistas

August 6, 2008

Do you love Chocolate? Then you’ll love The Chocolistas, a blog about all things chocolate. My sister-in-law and I run this site. We’re growing and adding new features all the time, including some exciting contests. Right now Name that Chocolate is going on. Readers offer up creative names for a very unique chocolate dessert, then everyone votes on the best name. Whoever comes up with the winning name gets a prize from a fabulous sponsor. Check it out!

Summer Chillers: Classic No-bakes

August 5, 2008

I don’t know if Classic No-bake cookies are technically Chillers, but they are a great summer cookie since they only require the use of the stove for a few minutes.

Chances are you’ve eaten these, and probably even made them yourself before. But if you’re not familiar, here’s the recipe.

Classic No-bake Recipe

1 3/4 cups white sugar
1/2 cup milk
1/2 cup butter
4 tablespoons unsweetened cocoa powder
1/2 cup crunchy peanut butter
3 cups quick-cooking oats
1 teaspoon vanilla extract

In a medium saucepan, combine sugar, milk, butter, and cocoa. Bring to a boil, and cook for 1 1/2 minutes. Remove from heat, and stir in peanut butter, oats, and vanilla. Drop by teaspoonfuls onto wax paper. Let cool until hardened.

There are several versions of this recipe out there. This is the only I’ve ever gotten to work. My mom has a recipe, but I can never get her’s to turn out for me. These can be a little tricky, because if you boil the chocolate mixture to long or not long enough, it won’t harden right. If it’s too humid in your house, that can also prevent the cookies from setting.

Summer Chillers: Chocolate Peanut Butter Bars

July 15, 2008

It was 90 degrees here today. Finally, a hot summer day! The kind of day where there’s nothing to do but spend it in the pool. We did drag ourselves back inside late in the afternoon once our skin was sufficiently pruney and bronzed.

When I started scratching up something to make for this week’s edition of Summer Chillers, I knew that I did not want to turn on the oven or the stove top.  So I called my mom to get this recipe. She informed me that this actually came from the school cafeteria where she taught before I was born. Don’t let that scare you though. It doesn’t taste anything like cafeteria food. That was back in the early 1970’s, and no one yet cared what their children were eating in school, so things still had sugar, fat and flavor in them.

Anyway, class, the only heat source you will need for today’s lesson is a microwave.

Chocolate Peanut Butter Bar Recipe

3/4 C of Butter or Margarine, melted plus a little more

3 Cups of Peanut Butter

3 3/4 Cups of Powdered Sugar

1 Tsp Vanilla

5 ounces of Chocolate Chips

Melt the butter in the microwave. Mix together the melted butter, peanut butter and powdered sugar. Press into the bottom of a 9×13 inch pan.

In the microwave melt the chocolate chips with a little bit of margarine. (This is how recipe was written. I used about a tablespoon.)

Spread the melted chocolate evenly over the peanut butter mixture. Refrigerate for two hours before cutting into squares and serving. And you must eat these things with milk. A LOT of milk. They’re good, but that’s a whole mess of peanut butter to wash down.

Melting Chocolate in the Microwave

Up until a few moths ago I melted chocolate the old fashioned way, in a double boiler. I got brave one day and decided to try it in the microwave. While it’s quicker and easier, it must be done very carefully. It takes only a few seconds too long to turn you chocolate into a hard, burned mess. How do I know? Let’s just say experience is the best teacher.

So put the chocolate in a heat proof bowl. Glass is better than plastic. Nuke it at 30 second intervals, stirring each time. Chocolate can deceive you by holding it’s shape even though it’s actually melting. When most of the chocolate is melted, take it out and stir until it’s smooth. A few remaining chunks will be dissolved by the chocolate that’s already hot and melted.

The same goes for melting butter in the microwave. It only takes about 30 seconds to a minute. You can melt it most of the way, then finish it up by taking it out and stirring. If you over cook the butter it will splatter, and you’ll have a nice greasy mess to clean up. I learned that hard way too.

Cookie of the Week: Tiny Fudge Tarts

June 4, 2008

Mmmmm! Yummy! This recipe is from a reproduction of Betty Crocker’s 1963 Cooky Book.

Tiny Fudge Tarts Recipe

1 1/2 cups of Flour

1/4 tsp. salt

1/2 cup of butter

3 tbsp water

1 tsp vanilla

Fudge filling

Fudge Filling Recipe

Mix together thoroughly:

1/4 cup of butter

1 egg yolk

1/2 cup of sugar

1 tsp of vanilla

1/4 cup of cocoa powder

Preheat oven to 350 degrees. Mix flour and salt; cut it in butter. Sprinkle with water and vanilla. Mix well with a fork. Using half of the dough at a time, roll out to 1/16 of an inch thick on a cloth covered board sprinkled generously with sugar. Cut into 2 1/2 inch squares. Spread 1 level tsp. of filling in the center of each square. Bring corners together and seal. Place on an ungreased baking sheet. Bake 15 to 20 minutes.

It took a little time to to make these because of the rolling, cutting and filling, but they are well worth it. The dough is easy enough to make. It’s just like making rolled biscuits, only a lot thinner. The filling is simple too. The recipe doesn’t call for it, but I’d advise letting your butter soften a little before adding it to the filling mixture. It’s a lot easier to stir.

This is a fun cookie to make with your kids. My three year and a half year old helped me do the rolling, filling and and sealing. It’s just like play-dough to him. But it got a little hairy towards the end when he lost interest, and decided playing in the flour bin was more fun. I’m dreaming of a white kitchen, not! Well it’s all cleaned up now, and the tarts are really tasty!